Difference between revisions of "Reinstalling on Same Computer"
| (One intermediate revision by the same user not shown) | |||
| Line 18: | Line 18: | ||
<gallery widths=288px heights=150px> | <gallery widths=288px heights=150px> | ||
| − | file:Prereq1. | + | file:Prereq1.png| '''Click Next''' |
| − | file:Prereq2. | + | file:Prereq2.png| '''Click Next''' ''(.Net Framework is skipped when your computer already has required version)'' |
file:Prereq3.png| '''Click Finish''' | file:Prereq3.png| '''Click Finish''' | ||
</gallery> | </gallery> | ||
Latest revision as of 08:57, 23 January 2018
1. Uninstall
Before uninstalling, it is important to know the location of your payment application database so that data is not lost. To find the location, go to Company > CHARGE Anywhere > Support. The Plug-In Path displays the database location.
1a. Close QuickBooks. Open a task manager and click on the Processes tab. Click on ‘Image Name’ to sort alphabetically and look for ‘ChargeAnywhereWrapper.exe’ and ‘QBW32.exe’.
- If either process was found, highlight and click end process.
1b. Open your control panel. Uninstall Payment Application first. Then uninstall QBFC8.0.
2. Reinstall
2a. Click here to download your QuickSale™ for QuickBooks software. (If you have the originally downloaded CHARGEAnywhere.zip, you can skip to step 2c.)
2b. Read and agree to the CHARGE Anywhere License Agreement, enter your license key and press Submit. (License Key is included in your activation email). Save the file, CHARGE Anywhere.zip, to the desktop of your computer.
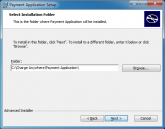
2c. Open the CHARGE Anywhere zip folder and double click the CHARGE Anywhere icon within to begin installation. Follow the prompts.
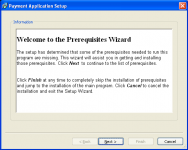
Click Next
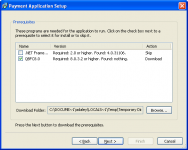
Click Next (.Net Framework is skipped when your computer already has required version)
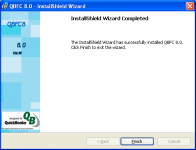
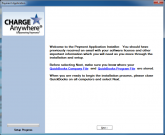
Click Finish


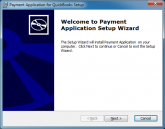
Click Next
Click Next
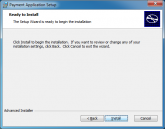
Click Install

Click Next
Click Next


<gallery widths=288px heights=150px> File:AdditionalComputers.png|Select Yes and browse to the location of payment application database (db4.mdb). Click Next. file:QBinstall7.png| Click Finish file:QBinstall8.png| Click Finish. The plug in now installed. Open QuickBooks.